| Author |
Message |
    
Forummaster
| | Posted on Sunday, November 25, 2001 - 10:15 pm: | 


|
Clarifier Modification for the Galaxy Melaka
1) Remove the Top and Bottom Covers.
2) On the TOP side of the mother board, locate and cut R-141 as shown in Picture #1.
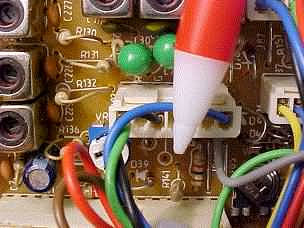
Picture 1
3) Solder a jumper wire across two contacts as shown in Picture #2 (this is the same area in which you removed the jumper wire for the channel modification).
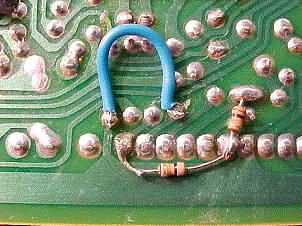
Picture 2
4) Solder another wire to board ground as shown in Picture #3.
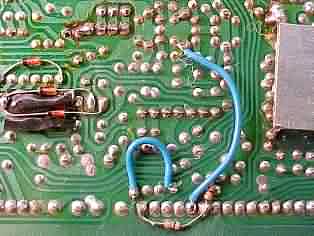
Picture 3
5) Locate and cut D-38 as shown in Picture #4.
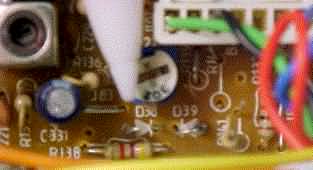
Picture 4
6) Set the Clarify knob to exactly 12:00 as shown in Picture #5.
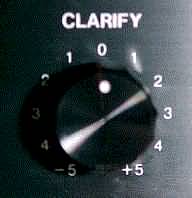
Picture 5
(You will now need your radio hooked to a Frequency Counter)
7) Key the microphone on channel 19 AM with no modulation and adjust L-19 (Picture #6) to exactly 27.185 Mhz. (Picture #7).
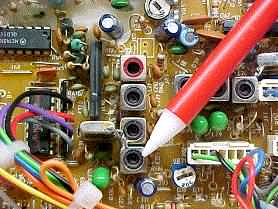
Picture 6
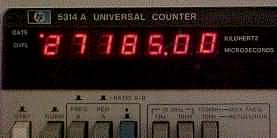
Picture 7
8) Switch to USB and key the microphone with an exact 1 Khz tone being injected into microphone and adjust L-20 (Picture # 8) to exactly 27.186 Mhz (Picture #9).
(You can use this FREE and GREAT Tone Generator to use right off your computer)
Free Tone Generator
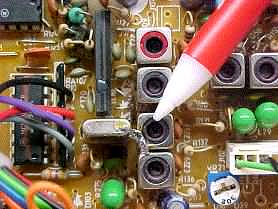
Picture 8
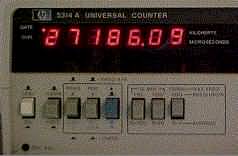
Picture 9
9) Switch to LSB and key the microphone with an exact 1 Khz tone being injected into microphone and adjust L-21 (Picture # 10) to exactly 27.184 Mhz (Picture #11).
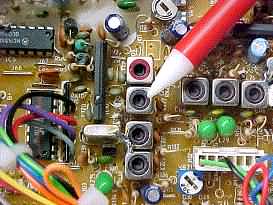
Picture 10
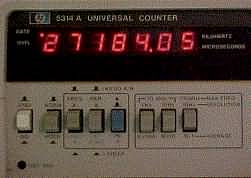
Picture 11
10) Replace the Top and Bottom Covers. Thatís it! My Melaka slides DOWN 7 Khz and UP 3.5 Khz. Enough for your sideband needs.
|
|


